Node Exercises
Create Nodes at Elevation
Use this tool to create entry points for each bench in the pit or dump.
To create nodes by elevation:
- Navigate to the sample data \NodesVersion folder.
- Open SampleModelWithNodes.hinf
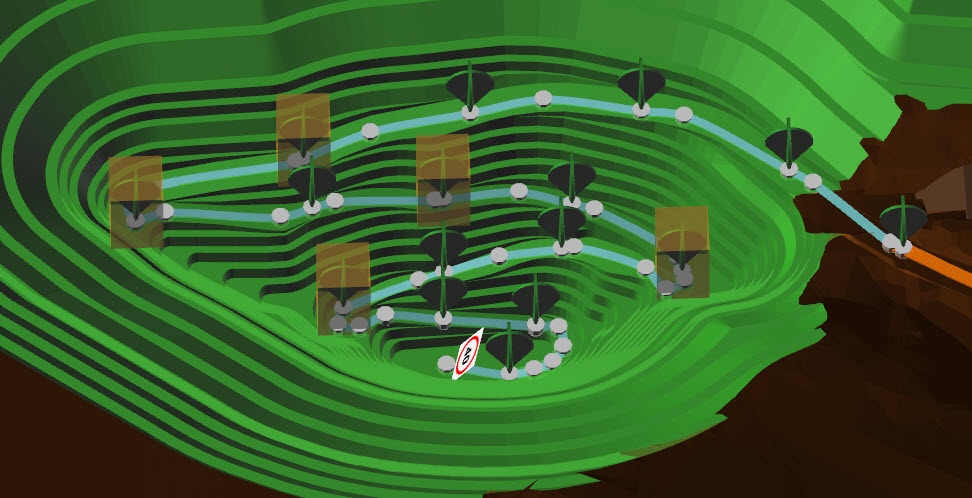
- Centre the pit in the Network tab.
- Hover the mouse over the pit floor and read the RL from the status bar in the bottom left of the screen. This should be 1030.
- Hover the mouse over the ramp crest and read the RL from the status bar. This should be 1120.
- Double-click the pit ramp to select the entire length.
- Right click > Create Nodes at Defined Elevations > As Bench Exits
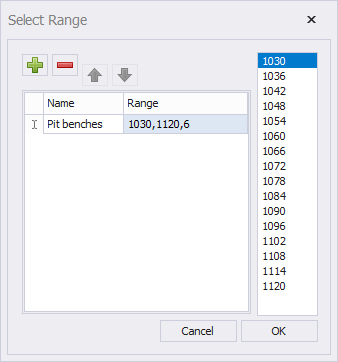
- Enter the range as <floor>,<crest>,<bench height>
- Press OK to contintue.
This will create nodes on the pit ramp at six metre intervals between the 1030 and 1120 elevations.
Node Naming
Nodes must have the same unique name in all projects and documentation.
- If you are processing a schedule, the nodes must have the same name as the schedule sources and destinations
- If you are interfacing with dispatch, the nodes must have the same name as they are called in the fleet management system
This means that nodes must be renamed from their default names.
To rename nodes in the Grid panel:
- Navigate to the sample data \NodesVersion folder.
- Open SampleModelWithNodes.hinf
- Centre the pit in the Network tab.
- Drag a box over the dump to select all dump nodes.
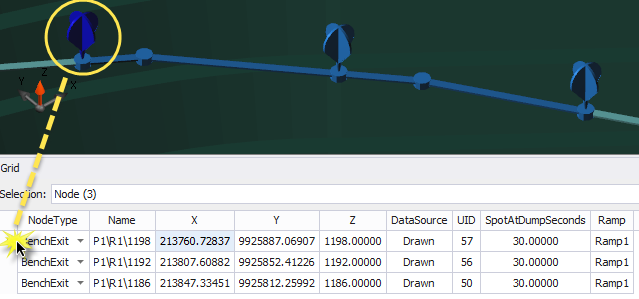
- Open the Grid tab below the viewport.
- Change the selection type to Nodes
Edit node names in the Name column
Use the keyboard shortcut Ctrl+H to use the find and replace function on selected cells.
Nodes can be renamed with formulas in Microsoft Excel.
Use Data > Export > Nodes & Segments to CSV.
Dump Time at Nodes
Every node has a SpotAtDumpSeconds property which controls the dump spot time at that location. For example, spot time at the crusher may be different from spot time on the main dump.
Set spot time at the crusher:
- Navigate to the sample data \NodesVersion folder.
- Open SampleModelWithNodes.hinf
- Open the Nodes panel in the bottom left of the screen.
- Find "Crusher" in the list.
- Right click and select "Zoom to". This should centre the crusher in the viewport.
- Go to the properties panel in the bottom right of the screen.
- Change the SpotAtDumpSeconds from 30 to 50 seconds.
This will increase the total cycle time of the truck by twenty seconds.
Use the Node Panel
The Node Panel is where nodes can be organised into groups for finding, hiding and editing.
Organise nodes by property:
- Navigate to the sample data \NodesVersion folder.
- Open SampleModelWithNodes.hinf
- Open the Nodes panel in the bottom left of the screen.
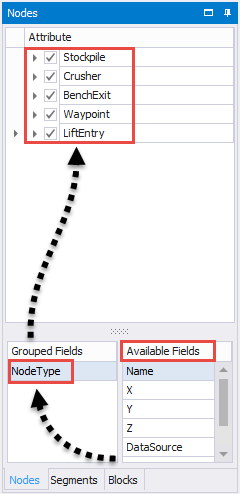
- Clear the Grouped Fields by dragging each row into the Available Fields list.
- To organise the Nodes by their type, drag "NodeType" from the Available Fields list into the Grouped Fields list.
- To organise nodes by their ramp, drag "Ramp" from the Available Fields list into the Grouped Fields list.
Create custom node properties:
- Go to Tools > Project Settings > Custom Properties
- Press the green plus icon
 to add a new property.
 - Rename the new property to "Region" and set the default to "ExPit".
- Press Okay to accept.
- Drag a box over the pit to select all in-pit nodes.
- In the properties panel change the selection the "Nodes".
- In the properties panel change the Region to "InPit"
- Go to the Nodes panel and drag Region to the top of the Group Fields.
The nodes will now be grouped into in-pit and ex-pit nodes.
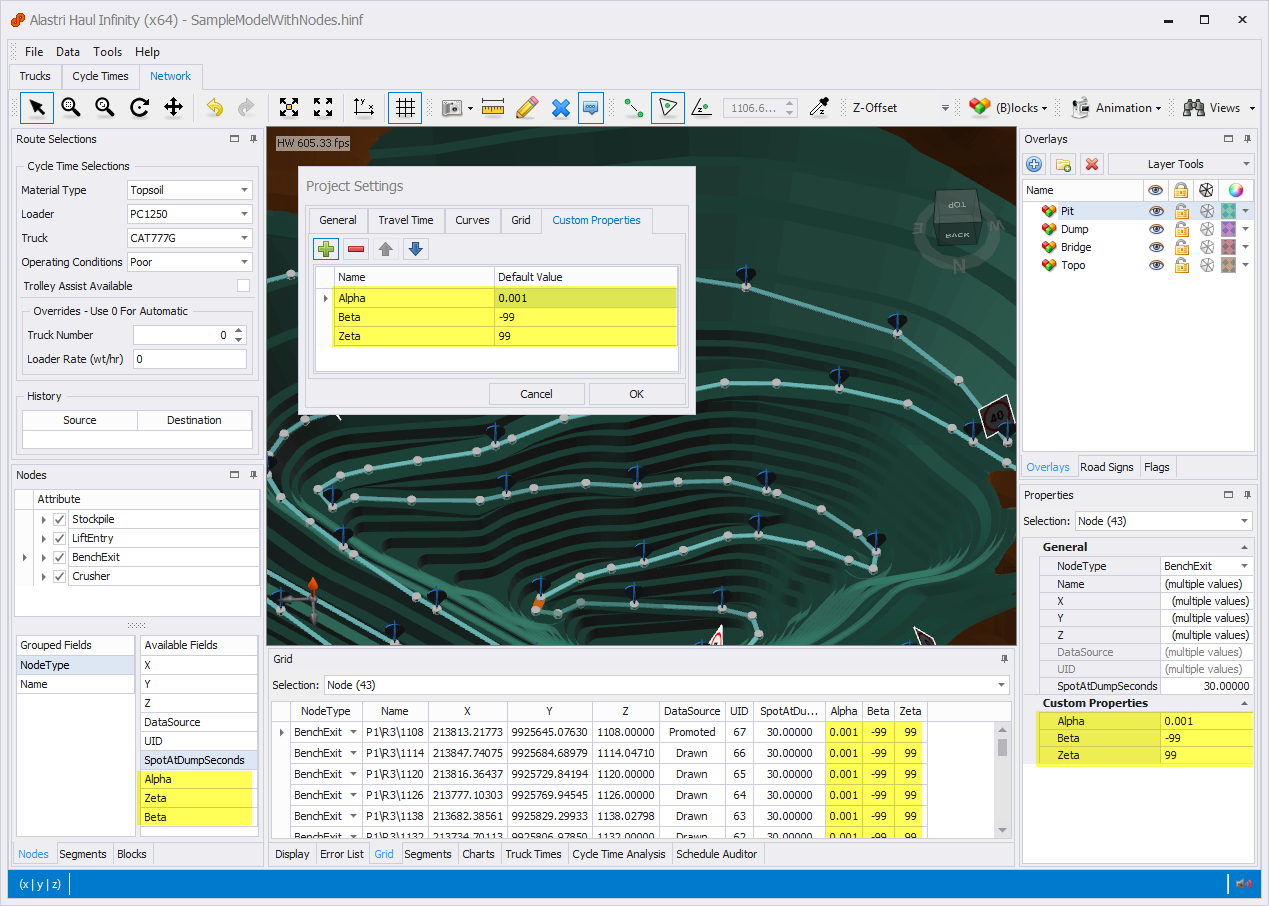
Example of custom node properties in different panels.